
Budget mechanical keyboards deliver a satisfying typing experience for a fraction of the cost of premium custom boards, but their switches, stabilizers, and thin PCB coatings are less forgiving of aggressive cleaning. Spray the wrong cleaner, pry with too much force, or soak the board, and you can end up with sticky, scratchy switches, chattering keys, or a dead row of inputs that costs more to fix than to replace. The good news is that most grime — dust, hair, crumbs, and the oily shine that builds up on keycaps — can be removed safely with gentle tools and a little patience, even on hot-swappable budget models you picked up in 2026.
This guide walks you through a switch-safe cleaning routine that works for both soldered and hot-swappable budget mechanical keyboards, including compact tenkeyless layouts and full-size 104-key models. You will not need special solvents or an ultrasonic cleaner, and you will not have to desolder anything.
As an Amazon Associate we earn from qualifying purchases at no extra cost to you. Product prices and availability are accurate as of the date shown and are subject to change.

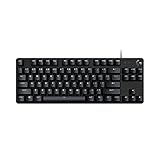
What You Need
| Item | Why | Optional? |
|---|---|---|
| Keycap puller (wire style, 3-4 inch) | Removes keycaps vertically without cracking stems or scratching switch housings; plastic ring pullers work but wire pullers distribute pressure more evenly | No |
| Small soft-bristle brush (1/2 to 1 inch wide, nylon or natural hair) | Sweeps dust from plate and between switches without bending pins | No |
| Compressed air canister or electric air duster (30-90 watts typical for rechargeable models) | Blows fine particles from hard-to-reach spots; use short bursts to avoid spinning fans or forcing debris deeper | No |
| Microfiber cloths (2-3 cloths, 12×12 inch) | Lints less than paper towels and will not abrade keycap legends | No |
| Isopropyl alcohol 70% or higher (small bottle, 4-8 oz is enough) | Dissolves oils on keycaps and case surfaces and evaporates quickly; never use acetone, bleach, or ammonia-based glass cleaner | No |
| Cotton swabs and wooden toothpicks | Detail cleaning around switch housings and stabilizer wires where cloths cannot reach | No |
| Small bowl with warm water and a drop of mild dish soap | For soaking keycaps only — not the keyboard itself; water should be lukewarm, not hot, about 85-100°F | No |
| Switch puller (for hot-swappable boards) | Lets you safely lift switches straight up if you need to clean underneath; using fingers or pliers can bend the 5 metal pins | Yes — only if your board is hot-swappable |
| Replacement switches, 35-pack ($14-$20 range, e.g. EPOMAKER Silent Mechanical Keyboard Switches Set – 35 Pieces Factory Pre-Lubed, 5-Pin Linear/Tactile Switches for Custom Mechanical Keyboards (Crystal Tactile Silent)) | Handy if you discover a damaged or overly scratchy switch during cleaning; having a matching 5-pin set prevents downtime | Yes |
| Small tray or ice cube tray | Keeps keycaps organized by row so you can reassemble without hunting for the right profile and size | Yes |
Step-by-Step
Step 1: Power Down and Document — 3 minutes
Unplug the USB cable. If your keyboard has a wireless dongle or Bluetooth, switch it off and remove any batteries if they are easily accessible. For a wired tenkeyless board that weighs 1.8 to 2.5 pounds, like the Logitech G413 TKL SE Mechanical Gaming Keyboard – Black (typically $55-$65 for this class), you do not need to remove the cable from the PC end, just ensure no power is reaching the board. Take a quick photo of the key layout with your phone. On standard layouts, keycap profiles vary by row, so the photo prevents you from mixing up R1 and R4 keys later.
Step 2: Remove Keycaps Correctly — 5 to 10 minutes
Use the wire keycap puller. Slide the two wires under opposite sides of a keycap, pull straight up with even, vertical force, and stop if you feel strong resistance. Larger keys — spacebar (6.25u), shift, enter, and backspace — have metal stabilizer wires underneath. Wiggle them gently side to side while lifting to avoid yanking the stabilizer bar out of its housing. Do not use a flathead screwdriver or knife; they chip keycap stems and can crack the switch top housing. Place caps in your tray by row.
Step 3: Dry Dust the Plate and Switches — 5 minutes
With all caps off, turn the keyboard upside down and give it a few light taps to dislodge loose crumbs. Then hold it at a 45-degree angle and use short bursts of compressed air, keeping the nozzle 3 to 4 inches away from the switches. Follow with the soft brush, sweeping from top to bottom between the switch housings. For stubborn hair wrapped around a stem, use the tip of a toothpick to lift it — do not pull hair across the switch with tweezers under tension, which can lift the stem.
Step 4: Wash Keycaps Separately — 10 minutes hands-on, 30 minutes drying
Place keycaps in the bowl of warm soapy water and let them soak for 5 to 10 minutes. Swirl occasionally. For textured shine or finger oils, rub each cap individually with your fingers or a microfiber cloth. Rinse thoroughly with clean water and lay them face down on a dry towel. Do not use hot water, a dishwasher, or isopropyl soak for ABS keycaps — heat warps thin 0.8 to 1.2 mm budget ABS walls and can fade pad-printed legends. Let caps air dry completely for at least 30 to 45 minutes; any trapped water inside the stem will drip into the switch if reinstalled early.
Step 5: Detail Clean the Board Surface — 8 to 12 minutes
Lightly dampen — not soak — a microfiber cloth with isopropyl alcohol. Wring until no drips form. Wipe the exposed plate, case edges, and around each switch housing. For the tight gaps around switches, wrap the cloth around a toothpick or use a cotton swab barely moistened with alcohol. Never spray cleaner directly onto the keyboard and never let liquid pool around the switch seams. If your board is hot-swappable and a switch feels gritty even after surface cleaning, you may carefully pull that single switch with a proper switch puller, brush the socket area, and reseat the same switch, ensuring the 5 pins are perfectly straight before pressing down evenly until it clicks.
Step 6: Clean Stabilizers Without Removing Them — 4 minutes
Budget stabilizers are often plate-mounted and lightly lubed at the factory. Do not remove them for a routine clean. Dab a dry cotton swab around the stabilizer stems and wire entry points to remove dust and old lube mixed with grime. If a stabilizer rattles, a tiny amount of thick dielectric grease on the wire is the correct fix, but for cleaning alone, dry removal of debris is enough. Avoid flooding the stabilizer housing with alcohol, which strips the thin factory lube and makes larger keys feel scratchy.
Step 7: Reassemble and Test — 5 minutes
Confirm the plate and all switch tops are completely dry. Reinstall keycaps by aligning each stem over its switch and pressing straight down until you feel a soft click. Do not hammer or press at an angle. Start with the large stabilized keys to verify the wires are seated, then fill in the alphas and modifiers using your reference photo. Plug the keyboard back in and test every key in a text editor or an online keyboard tester. Each press should register once without sticking or double-typing.
Mistakes to Avoid
The most common damage comes from impatience and excess liquid. Do not submerge the keyboard, run it under a faucet, or pour alcohol between switches to flush debris. Budget boards rarely have the sealed gaskets or water-resistant nano-coatings of higher-end models, and liquid that seeps past the plate can corrode the PCB within hours.
Avoid high-pressure air at point-blank range. Holding a canister upside down releases freezing propellant that can crack switch housings and leaves a residue. Keep the can upright and use 1-second bursts.
Do not pry keycaps or switches with metal tools. Screwdrivers bend contact pins and gouge the aluminum or plastic top plate. Wire pullers cost $5-$10 and prevent $15-$30 in replacement parts.
Skip harsh cleaners. Acetone, bleach, hydrogen peroxide, and ammonia will cloud clear switch housings, dissolve lube, and bleach keycap legends. Stick to 70% or higher isopropyl alcohol on a cloth, never directly on the board.
Do not use a vacuum with a brush head directly on exposed switches unless it has a low suction setting and a narrow nozzle kept 1 to 2 inches away. Strong suction can lift stabilizer inserts or pull lightweight 35-45 gram linear switches partially out of hot-swap sockets, bending pins.
How Often
For a daily driver used 4 to 8 hours per day, a quick dry dusting every 2 to 3 weeks prevents buildup. Tap out debris, use compressed air, and wipe the keycaps with a dry microfiber. A full keycap-off deep clean every 3 to 6 months is sufficient for most home and office environments.
If you eat at your desk, have pets, or keep the keyboard on carpet, shorten that interval. Pet hair and fine crumbs accumulate faster on keyboards that sit low to a desk mat. In that case, dry dust weekly and deep clean every 2 to 3 months.
If you notice keys feeling sluggish, sounding muted, or showing a greasy shine before the scheduled interval, clean the affected area early rather than waiting. Light, frequent maintenance is far safer for budget switches than infrequent, aggressive scrubbing.
When to Call a Pro or Replace
Budget mechanical keyboards, including popular sub-$60 tenkeyless models, are designed to be affordable to replace rather than extensively repaired when the PCB is damaged. Consider replacement instead of professional repair if you see these signs: multiple keys in the same row or column stop registering after cleaning, the board is recognized intermittently by your PC, you see green or white corrosion around the USB port or screws, or a switch socket feels loose and no longer holds a switch firmly after reseating.
A single faulty switch in a hot-swappable board is an easy fix. A 35-piece set of factory pre-lubed silent tactile switches in the $14-$20 range gives you spares for future issues without buying a whole new board. If your keyboard is soldered and one switch chatters, double-types, or is physically cracked, a local electronics repair shop can desolder and replace it for $15-$35 in labor plus parts, but if two or more switches need work, the cost often exceeds the price of a new budget board in the $40-$70 range. In that case, replacing the entire unit is more economical and reliable.
Do not attempt to open the case and separate the PCB from the plate unless you are comfortable with ribbon cables and small screws. Stripped screws and torn cables are common DIY errors that turn a simple cleaning into a total loss.
FAQ
Can I remove switches to clean under them?
Only if your keyboard is explicitly marketed as hot-swappable. Check the product specs for terms like 3-pin or 5-pin hot-swappable. If it is, use a switch puller to lift straight up after removing the keycap. If it is soldered, do not pull — you will tear the switch from the PCB and break solder joints. For soldered boards, surface brushing and air are the safe limits.
Is it safe to use water anywhere near the keyboard?
Water is safe for keycaps once they are off the board, but not for the board itself. Even a small amount that seeps into the switch housing can cause corrosion or make the stem feel sticky as it dries. If you accidentally drip water on the plate, unplug immediately, shake gently, and let the board dry face-down for 24 hours before powering on.
Will compressed air damage budget switches?
When used correctly, no. Use short, upright bursts from 3 to 4 inches away and never hold the trigger continuously. Avoid shaking the can or spraying upside down. Electric dusters with 30- to 90-watt motors are a reusable alternative and eliminate propellant risk, but keep them on a low setting and at the same distance.
How do I keep my keyboard cleaner for longer?
Keep food and drinks at least 12 inches away, wash and dry hands before long typing sessions, and use a light cover or close the cloth dust cover when not in use. A large desk mat (31.5 x 11.8 inches is common) catches dust before it reaches the plate, and a quick 30-second brush-off at the end of each week prevents the heavy buildup that requires aggressive cleaning.


