
Our Top Picks
 Complete Candle Making Kits for Adults BeginnersComplete Candle Making Kit6.5 x 5 x 5 inches2.7 poundsCheck on Amazon

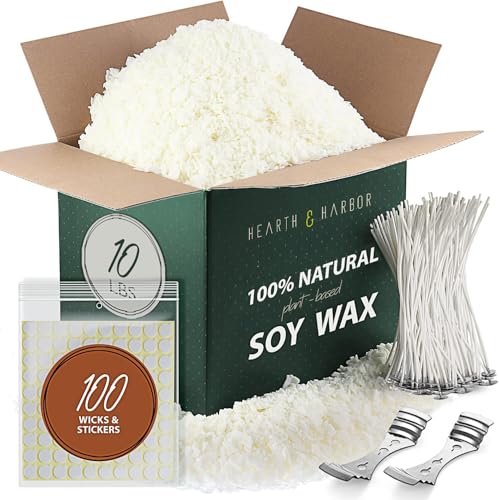

Top 3 picks at a glance
Best Candle Making Kits for Beginners and Gifts
The best candle making kits for beginners are the ones that include pre-measured wax, compatible wicks, fragrance oils, containers, a thermometer, and clear instructions—rather than simply offering the largest box of supplies.
A useful starter kit should make a small, repeatable batch while teaching the basic variables: wax temperature, fragrance percentage, wick choice, and cooling time. For most first-time makers, a soy-wax kit producing four to six candles is the best balance of cost, safety, and learning value. Paraffin kits are easier to scent and often give stronger color, while beeswax kits are attractive gifts but usually cost more and offer fewer fragrance options.
As an Amazon Associate we earn from qualifying purchases at no extra cost to you.



Quick recommendations by buyer
| Buyer or skill level | Best kit format | Recommended batch size | What to prioritize |
|---|---|---|---|
| First-time maker | Soy container-candle kit | 4–6 candles, 6–8 oz each | Pre-tabbed wicks, thermometer, instructions, one or two fragrances |
| Gift recipient who enjoys crafts | Decorative soy or beeswax kit | 4–8 candles | Attractive vessels, labels, varied scents, gift-ready packaging |
| Maker testing different scents | Multi-fragrance soy or paraffin kit | 6–12 small candles | Several 1 oz fragrance samples and multiple wick sizes |
| Experienced hobbyist | Bulk wax and refill-oriented kit | 12 or more candles | Wax cost per pound, wick range, reusable equipment, refill availability |
| Family activity | Low-temperature beeswax-sheet kit | 6–10 rolled candles | Minimal heating, blunt tools, supervision requirements |
Which wax type makes the best starter kit?
Soy wax: the best all-round choice
Soy container wax is usually the safest recommendation for beginners. It is widely available, produces a creamy appearance, and works well in jars and tins. Its main limitation is that it can develop frosting, wet spots, or uneven tops if the room temperature and cooling process are inconsistent.
Choose a soy kit when the goal is learning standard container candles, giving handmade gifts, or finding inexpensive refills later. Look for wax specifically labeled for containers; pillar soy wax has different hardness and wick requirements.
Paraffin: strong scent and easier color
Paraffin generally gives vivid colors, smooth surfaces, and strong fragrance performance. It is a practical choice for a maker who cares more about scent throw and appearance than using a plant-based wax. A paraffin kit can also be forgiving when experimenting with fragrance and dye.
Its disadvantages are less appealing marketing for some gift recipients and the need to follow the kit’s heating instructions carefully. “Natural” and “synthetic” are not reliable indicators of candle quality; correct wick sizing and safe burning matter more.
Beeswax: attractive, simple, and comparatively expensive
Beeswax has a naturally warm color and mild honey scent. Rolled beeswax sheets can often be made without melting wax, which makes them a good supervised family activity. Pouring beeswax into containers is more demanding because it has a higher melting point and can shrink as it cools.
Select beeswax for a decorative gift or a low-fragrance project. Do not choose it solely because it sounds easier: a poured beeswax kit still needs heat-safe equipment and careful temperature control.
What should a complete kit include?
- Wax: Enough for the stated number of candles, with the wax type and intended use clearly identified.
- Wicks: Pre-tabbed cotton or wooden wicks, ideally with at least two sizes for testing.
- Containers: Heat-resistant candle vessels, not ordinary drinking glasses or decorative jars.
- Fragrance oil: Candle-safe fragrance with a stated recommended usage rate.
- Thermometer: A clip-on or digital thermometer capable of reading roughly 100–220°F.
- Melting equipment: A pouring pitcher or double-boiler insert. A kit that assumes a saucepan but gives no safe melting method is incomplete.
- Wick centering tools: Clips, sticks, or dedicated holders to keep the wick vertical while the wax sets.
- Safety items: Heat-resistant gloves, protective instructions, and warnings about hot wax and fragrance handling.
- Labels: Space to record wax, fragrance, date, and burn-test notes.
Dyes, botanicals, glitter, and decorative toppings are optional. They may look impressive in photographs, but they are less useful than a thermometer and correctly sized wicks. Dried flowers, herbs, paper, and other flammable decorations can create a fire hazard near the flame and should not be treated as essential candle supplies.
Batch size and the real amount of wax
Kit descriptions often advertise the number of candles without explaining the fill weight. Use this calculation before buying:
Wax required = container fill weight × number of candles ÷ (1 − fragrance fraction).
For example, suppose a kit promises six 8-ounce candles by volume. A typical 8-ounce vessel may hold about 6.5 ounces of wax by weight. At an 8% fragrance load:
6.5 × 6 ÷ 0.92 = 42.4 ounces
That project needs approximately 42 ounces of total wax-and-fragrance mixture, or about 39 ounces of wax before fragrance is added. If the kit contains only 24 ounces of wax, it cannot produce six full candles at that size; it may instead produce six smaller candles or require a lower fill level.
For a first project, four to six candles in the 6–8 ounce range is usually better than a 12-candle box. It limits waste when a wick or fragrance combination needs changing, while still leaving enough candles for a successful second attempt.
Fragrance selection and refill costs
A kit with one large fragrance bottle is economical only if the recipient already knows that scent is desirable. For learning, three or four smaller fragrances are more useful because fragrance affects both the experience and the testing process. Good starter themes include one fresh scent, one wood or spice scent, one floral scent, and one bakery or fruit scent.
Check whether the fragrance is intended for candles and whether the supplier provides a maximum usage rate. Many beginner projects start around 6–8% fragrance by wax weight, but the wax manufacturer’s guidance takes priority. More fragrance does not automatically mean a stronger candle; excess oil can cause sweating, poor adhesion, or an unsafe burn.
Refill economics also matter. A starter kit costing roughly $30–$60 can be reasonable if later supplies are available separately. For repeated batches, wax commonly costs around $4–$10 per pound depending on type and quantity, while fragrance oils often range from roughly $5–$15 for a small bottle. Containers may cost $1–$5 each, and replacement wicks are usually inexpensive when bought in packs.
| Refill item | Typical small-quantity range | Why it affects long-term value |
|---|---|---|
| Soy container wax | $4–$10 per lb | The largest recurring material cost |
| Fragrance oil | $5–$15 per small bottle | Several scents increase experimentation cost |
| Pre-tabbed cotton wicks | $5–$12 per multi-pack | Different vessels may need different sizes |
| Small metal tins or glass vessels | $1–$5 each | Reusable jars can lower future batch costs |
| Replacement thermometer | $8–$20 | Essential if the kit omits one or includes a fragile tool |
How to make the first batch safely
- Prepare the workspace. Use a stable, heat-resistant surface with good ventilation. Keep children, pets, loose clothing, and anything flammable away from the melting area.
- Measure by weight. Weigh wax and fragrance instead of relying on cups or spoons. This makes the recipe repeatable.
- Melt gently. Use a double boiler or the kit’s recommended melting method. Never leave heating wax unattended, and never pour water into hot wax.
- Add fragrance at the specified temperature. Stir slowly for about two minutes so the oil disperses without introducing excessive air.
- Secure and center the wick. Fix the wick to the vessel base and keep it upright during pouring and cooling.
- Pour and cool without moving the vessels. Rapid cooling or drafts can cause cracks and uneven tops. Follow the wax maker’s cure guidance before burning.
- Burn-test one candle. Trim the wick to about 1/4 inch before lighting. During a test burn, watch for excessive soot, a very tall flame, overheating, or a melt pool that reaches the container edge too quickly.
Common beginner mistakes
- Choosing a kit by candle count alone: Confirm the actual fill weight and vessel size.
- Ignoring wick compatibility: The same wick does not work equally well in every diameter, wax, and fragrance combination.
- Adding decorative materials: Keep combustible objects away from the flame and wax pool.
- Burning immediately: Soy candles often benefit from a longer cure period, so an attractive first-day result may not be the final scent performance.
- Pouring leftover wax down a drain: Let it harden, scrape it out, and dispose of it according to local waste guidance.
Frequently asked questions
Can I use any jar or glass for making candles?
No. Use heat-resistant candle vessels rather than ordinary drinking glasses or decorative jars. The container should be suitable for candle use and able to tolerate hot wax and the heat produced during burning. A complete kit should identify appropriate containers, and the vessels should remain stable on a heat-resistant workspace while the wax is poured and cools.
Do I need to buy separate tools if a kit includes wax and fragrance?
Possibly. A useful kit should also include a thermometer, safe melting equipment such as a pouring pitcher or double-boiler insert, wick-centering tools, suitable containers, and clear safety instructions. Pre-tabbed wicks and labels are helpful as well. Dyes, botanicals, glitter, and decorative toppings are optional and less important than correctly sized wicks and a thermometer.
How should I measure candle ingredients?
Measure wax and fragrance by weight rather than relying on cups or spoons. Weighing makes the recipe repeatable and helps you follow the recommended fragrance usage rate. The wax manufacturer’s guidance should take priority, since adding more fragrance does not automatically create a stronger candle and may cause sweating, poor adhesion, or an unsafe burn.
Why should I let candles cool without moving them?
Leave the vessels undisturbed while the wax cools because rapid cooling or drafts can cause cracks and uneven tops. Keep the candles on a stable, heat-resistant surface and avoid moving them during this stage. Afterward, follow the wax maker’s cure guidance before burning so the finished candle has time to develop properly.
What should I record when making candles?
Record the wax type, fragrance, date, and burn-test notes on a label or other project record. These details help you compare batches and identify useful combinations of wax, fragrance, and wick. During a burn test, trim the wick to about 1/4 inch first and watch for excessive soot, a very tall flame, overheating, or an unsuitable melt pool.
Final buying advice
For most beginners and gift recipients, choose a four-to-six-candle soy container kit with a thermometer, pre-tabbed wicks, three or more candle-safe fragrances, heat-resistant vessels, and clear temperature guidance. Choose paraffin when vivid color and strong scent are the priority, and beeswax when the gift is mainly decorative or designed as a supervised low-heat activity. The best value is not the kit with the most extras; it is the one that teaches repeatable measurements and allows affordable wax, fragrance, wick, and vessel refills after the first batch.


