
Scouting for an open-box PC case is one of the smartest ways to stretch your system-building budget. Because PC cases are primarily mechanical rather than electronic, a returned or open-box unit often offers the exact same structural performance as a brand-new retail model at a fraction of the cost. You can easily find open-air test benches, minimalist frames, or high-airflow Micro-ATX enclosures discounted by 20% to 50% simply because a previous buyer changed their mind or tore the cardboard packaging.
However, shopping the open-box inventory requires a sharp eye. The single biggest mistake builders make is assuming an open-box case is identical to a factory-sealed one. In reality, previous buyers frequently lose proprietary screws, warp delicate aluminum panels during half-finished installations, or drop tempered glass panels onto hard floors, causing micro-fractures that fail later under thermal stress. To secure a true bargain without the headache of a partial return, you need to know exactly what structural details, clearance measurements, and hardware components to verify before finalizing your purchase.
As an Amazon Associate we earn from qualifying purchases at no extra cost to you. Product prices and availability are accurate as of the date shown and are subject to change.


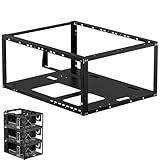

Top 3 picks at a glance
Decide These 3 Things First
Before diving into open-box listings or warehouse clearance shelves, establish these three baseline decisions to narrow your search and prevent buying incompatible hardware:
- Enclosure Style (Traditional Closed vs. Open-Frame/Test Bench): Decide whether you want a conventional dust-shielded box or an open-air chassis. Traditional closed cases protect components from household hazards and dampen fan noise. Open-frame DIY test benches (often ranging from $16.99 to $36.99) offer maximum access for part-swapping and unrestricted airflow, but they expose your graphics card and motherboard to dust, pet hair, and accidental spills.
- Your Motherboard Form Factor: You must match the case to your motherboard size. The main standards are Mini-ITX (6.7 x 6.7 inches), Micro-ATX (9.6 x 9.6 inches), and standard ATX (12 x 9.6 inches). While a large ATX open-frame bench can technically hold a tiny Mini-ITX board, a compact Micro-ATX case like the Cooler Master Q300L will physically reject a full-sized ATX motherboard.
- Maximum Component Clearance: Write down the physical dimensions of your high-ticket parts. Specifically, note your graphics card (GPU) length (typically between 240mm and 360mm) and your CPU air cooler height (often between 150mm and 170mm). Because open-box items rarely come with their original printed manuals, you must verify these clearances online before purchasing to ensure your components physically fit inside the frame.
Form Factor and Motherboard Compatibility
Size dictates everything in a PC build. When evaluating an open-box case, check the motherboard tray layout carefully. Look at the brass standoff mounting holes pre-drilled into the tray. Standard ATX cases require nine standoffs, Micro-ATX cases require six to eight, and Mini-ITX cases require four.
Pay close attention to the expansion slot layout on the rear of the case. A standard ATX mid-tower features seven expansion slots, whereas a compact Micro-ATX case features four. If you plan to install a thick, modern three-slot graphics card alongside a secondary PCIe capture card, a Micro-ATX case will run out of physical space rapidly. Additionally, check the physical footprint and weight of the chassis. A traditional steel mid-tower weighs between 12 and 18 pounds empty, requiring a sturdy desk surface, whereas minimalist open-frame DIY racks weigh a mere 2 to 5 pounds, making them incredibly portable but easier to tip over if loaded with a heavy power supply.
Material Quality and Structural Integrity
The materials used in a PC case determine its longevity, acoustic properties, and safety. In open-box units, material defects are the most common reason for the initial return. Look for these specific material standards:
- Steel Thickness (SPCC vs. SECC): Budget cases typically use 0.5mm SPCC (Commercial Quality Cold Rolled Carbon Steel Sheet). This thin steel is highly prone to warping under the weight of a heavy power supply or large graphics card. Look for mid-range and premium cases that utilize 0.7mm to 0.8mm steel, which provides a rigid structure that resists flexing.
- Aluminum Alloys: Premium open-frame test benches and high-end boutique cases often use structural aluminum profiles or thick aluminum plates (2.0mm to 3.0mm). While aluminum is lightweight and highly resistant to corrosion, its screw threads strip easily if over-tightened. Inspect the threaded holes on an open-box aluminum frame to ensure the previous owner did not cross-thread the screws.
- Tempered Glass vs. Acrylic: Acrylic side panels (found on budget options like the $39.99 Cooler Master Q300L V1) are lightweight and shatterproof, but they scratch easily under basic cleaning. Tempered glass panels (3mm to 4mm thick) offer pristine clarity and scratch resistance but are susceptible to shattering if bumped on their edges. Inspect the corners of open-box glass panels for tiny chips; even a microscopic chip can cause the entire panel to spiderweb under thermal load.
Completeness of Construction and Hardware Kits
When a buyer returns a PC case, they rarely organize the tiny screws and accessories that came with it. An open-box case frequently arrives missing its essential hardware kit. Before accepting an open-box unit, verify the presence of these crucial construction elements:
First, check the motherboard standoffs. These small brass hex spacers keep the back of your motherboard’s electrical traces from touching the metal case tray, preventing a catastrophic short circuit. Ensure there are at least six to nine standoffs included, or be prepared to purchase a cheap universal standoff kit separately.
Second, inspect the PCI-e bracket covers on the rear of the case. Budget cases often use “snap-off” metal covers that cannot be reattached once removed. If the previous owner snapped these off and returned the case, you will be left with gaping holes in the back of your chassis unless you buy aftermarket screw-in covers. Finally, check for proprietary drive caddies and rubber anti-vibration grommets. Many modern cases use toolless plastic trays to slide 3.5-inch hard drives or 2.5-inch SSDs into place. If these proprietary trays are missing, mounting your storage drives securely becomes nearly impossible.
Thermal Performance and Dust Management
A beautiful PC case is useless if it chokes your components. Thermal dynamics should guide your choice, especially when selecting between open-air frames and closed enclosures. Looking ahead to 2026, the trend toward high-draw, high-wattage graphics cards makes airflow design more critical than ever.
For closed cases, look for high-airflow mesh front panels rather than solid plastic or glass fronts. Solid front panels restrict intake, forcing fans to spin faster and louder to pull air through narrow side slits. Ensure the case supports modern fan configurations: a minimum of three 120mm (or two 140mm) front intake mounts, two 120mm top exhaust mounts, and one 120mm rear exhaust mount.
Dust management is another critical factor. Check that the open-box case still includes its original magnetic dust filters on the front, top, and bottom power supply intakes. Missing dust filters mean you will need to manually blow dust out of your system components every few weeks. If you opt for an open-frame DIY rack, remember that while thermal throttling is virtually eliminated due to unlimited ambient air access, your components will accumulate dust continuously, requiring regular maintenance with compressed air.
Price Tiers and Real-World Value
To determine if an open-box PC case is truly a good deal, compare its marked-down price against these standard retail market segments:
- Budget Tier ($15 to $45): This bracket includes basic open-air test benches, minimalist DIY aluminum frames, and entry-level Micro-ATX cases. Examples include the AL01 Open Frame bench ($19.99) and the Cooler Master Q300L ($39.99). When buying open-box in this tier, look for discounts of at least 30% off the retail price to make the purchase worthwhile, as shipping costs can easily eat into your savings.
- Mid-Range Tier ($50 to $100): This segment features popular steel mid-towers with tempered glass side panels, integrated power supply shrouds, decent cable management channels, and basic pre-installed fans (usually two 120mm non-RGB fans). An open-box price of $45 to $70 in this category represents excellent value, provided the glass panel is scratch-free and all motherboard standoffs are present.
- Premium Tier ($105 to $250+): This includes dual-chamber panoramic glass cases, heavy-duty stackable server racks, and premium aluminum open-frame test benches. These cases often feature advanced cable routing grommets, PWM fan hubs, and support for massive 360mm or 420mm liquid cooling radiators. Look for open-box discounts of $40 to $80 off retail in this tier, making sure the integrated fan hubs and front-panel USB-C cables are fully functional.
Warranty Coverage and Return Policies
One of the biggest hidden trade-offs of buying open-box PC cases is the loss of the original manufacturer’s warranty. While brands like Corsair, Lian Li, and Cooler Master offer robust 2-year to 5-year warranties on brand-new cases, these warranties often do not transfer to second-hand or open-box purchases sold by third-party liquidators.
Always buy open-box items from retailers that offer a minimum of a 30-day, hassle-free return window. This gives you ample time to unbox the chassis, dry-fit your motherboard and graphics card, test the front panel I/O ports, and ensure that the power button and USB jacks work reliably. Avoid “As-Is” or “Final Sale” listings unless the price is so low (under $20) that you are willing to treat the purchase as a gamble.
Spec Checklist
Use this quick reference table to compare what you should expect across different price tiers when hunting for an open-box PC case:
| Spec / Feature | Budget ($15 – $45) | Mid-Range ($50 – $100) | Premium ($105 – $250+) |
|---|---|---|---|
| Primary Material | 0.5mm SPCC Steel / Acrylic / Thin Aluminum Profiles | 0.7mm SPCC Steel / 3mm Tempered Glass | 0.8mm+ Steel / 4mm Tempered Glass / Thick Anodized Aluminum |
| Max GPU Clearance | Up to 280mm – 300mm | Up to 320mm – 360mm | 380mm to 450mm+ (Fits all modern cards) |
| Dust Filters | None or basic single-layer mesh | Magnetic PVC mesh on top/front, slide-out PSU filter | Fine-mesh nylon filters with structural plastic frames |
| Front Panel I/O | USB 2.0 / USB 3.0 Type-A, Audio Jacks | Dual USB 3.0 Type-A, Audio Jacks | USB 3.2 Gen 2 Type-C, Dual USB 3.0, Dedicated LED Control |
| Cable Management | Minimal (less than 15mm clearance behind tray) | Decent (15mm – 22mm clearance, basic velcro straps) | Excellent (25mm+ clearance, deep routing channels, rubber grommets) |
Red Flags
When inspecting an open-box PC case in a physical store or immediately upon delivery, watch out for these critical red flags that indicate you should return the item immediately:
- Asymmetric Frame Gaps: Place the empty case on a completely flat table. If the case wobbles, or if the gaps between the side panels and the main steel chassis are uneven, the frame has been dropped or warped during a previous shipping attempt. A warped frame makes motherboard installation difficult and can put dangerous physical stress on your motherboard PCB.
- Stripped Power Supply Mounting Holes: Check the four screw holes on the rear of the case where the ATX power supply mounts. Because power supplies are heavy, these threads must be crisp and clean. If the previous owner stripped these threads, your power supply will sag or vibrate loudly against the frame during operation.
- Missing Front Panel I/O Cables: Look behind the front power button. You should see a bundle of thin cables ending in headers labeled “POWER SW,” “RESET SW,” “HDD LED,” and “PLED.” If these cables have been cut, torn, or are missing entirely, you will not be able to turn your PC on using the case’s physical power button without tedious manual splicing.
- Cracked Rubber Grommets: High-quality cases use rubber grommets in the cable routing holes to protect your power cables from scraping against sharp metal edges. If these grommets are torn, missing, or dry-rotted, it indicates poor storage conditions or aggressive previous use.
FAQ
Are open-box PC cases safe to buy?
Yes, open-box PC cases are highly safe to buy, provided you purchase them from a reputable retailer with a clear return policy. Unlike complex electronic components like motherboards or graphics cards, PC cases are primarily mechanical structures. As long as the frame is straight, the front-panel USB ports are functional, and you have the necessary screws to mount your hardware, an open-box case will perform identically to a brand-new retail unit while saving you significant money.
What is the difference between an open-box case and an open-frame case?
An “open-box” case refers to the retail condition of the item—meaning it was purchased, opened, and returned to the store, then put back on sale at a discount. An “open-frame” case (or open-air case) refers to the physical design style of the chassis. Open-frame cases do not have solid outer walls or glass side panels; they are minimalist, open-air structures designed for maximum airflow, easy component testing, and a raw, industrial aesthetic.
Do open-box PC cases come with all the necessary screws?
Not always. Missing hardware kits are the most common issue with open-box PC cases. Previous buyers often open the accessory bag, use a few motherboard standoffs or fan screws, and forget to include them when returning the case. Before starting your build, check if the case includes motherboard standoffs, power supply screws, and hard drive mounting pins. If they are missing, you can easily purchase a universal PC screw kit online for under $10.
How do I test an open-box PC case for damage upon arrival?
To thoroughly test an open-box case, first perform a visual inspection on a flat surface to check for frame warping or wobbly feet. Run your fingers along all metal edges to check for dents or sharp, bent tabs. Next, test every single thumb screw and side panel latch to ensure they align and thread smoothly. Finally, before installing your expensive hardware, plug the case’s front-panel USB and audio cables into an old system or test board to confirm that the physical power button, reset button, and USB jacks function correctly.


