
The best kimchi storage containers for fermentation are airtight, BPA-free E-Jen-style kimchi containers with a press-down inner lid and CO2 release valve for active ferments, with glass containers like Glasslock as the best odor-free alternative for small batches stored in a standard refrigerator.
As an Amazon Associate we earn from qualifying purchases at no extra cost to you.
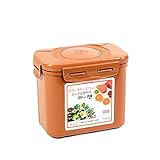
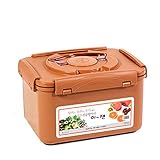

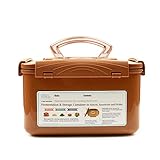
Our Top Picks
 Crazy Korean Cooking Premium Fermentation and Storage Container1.3 Gal (5.2L) 1 PACK10 x 7.5 x 5.8 inchesCheck on Amazon
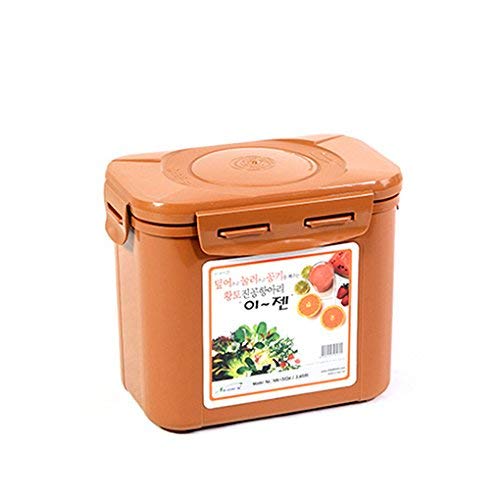

Top 3 picks at a glance
What Actually Makes a Container Safe for Kimchi Fermentation
Not every airtight container can handle fermentation. Kimchi produces CO2 and lactic acid for weeks, which creates pressure, acidity, and strong odor that will warp, stain, or leak from the wrong material. For fermentation, a container needs four things:
- Acid resistance: Polypropylene (PP), borosilicate glass, and soda-lime tempered glass do not react to pH 3.5-4.5 kimchi brine. Avoid unlined metal and low-grade polyethylene that absorbs color and odor.
- Pressure management: Either a one-way valve / vacuum seal that vents CO2 without letting oxygen in, or enough headspace and a manual burp routine for fully sealed glass.
- True airtight seal: Four-hinge locking lids with silicone gaskets outperform single-lid press fits for leak resistance when containers are tipped in the fridge.
- Odor barrier: Glass is non-porous and will not retain smell. Food-grade PP with a silicone gasket is the next best, but will absorb odor over time if not cleaned with baking soda and sunlight.
How Much Usable Capacity Do You Really Need?
Kimchi expands. You cannot fill a container to the brim. During the first 3-7 days at room temperature and the first 2 weeks in the fridge, brine rises and bubbles can increase volume by 15-25%.
Worked calculation for batch size:
Rule: Usable kimchi capacity = Total container volume x 0.70 to 0.75. The remaining 25-30% is headspace for brine rise and gas.
If you make a typical napa cabbage batch using 2 large heads (about 4.5 kg / 10 lbs before salting), you will end with roughly 3.2 – 3.5 liters of packed kimchi + brine. Calculation: 3.5 liters / 0.70 = 5.0 liters total container needed. That means a 3.4L (0.9 gal) container will overflow, while a 5L to 5.5L container gives safe headspace. For a small 1 kg cabbage test batch (~0.8 liters packed), a 1.1L to 1.3L container is the correct fit.
For mixed fridge storage, two medium containers are more practical than one large 10L+ crock. They chill faster, are easier to seal after opening, and reduce oxygen exposure each time you serve.
Standard Container Sizes and Refrigerator Fit
| Container Class | Total Volume | Usable Kimchi Volume (70% fill) | Typical Footprint (L x W x H) | Best For |
|---|---|---|---|---|
| Small Glass (e.g., Glasslock 1L Rectangular) | 1.1 L | 0.75 L | 18 x 13 x 7 cm | 1-person, small radish kimchi or leftover kimchi |
| Medium PP Press-Lid (e.g., E-Jen 3.4L) | 3.4 L | 2.3 L | 21 x 21 x 16 cm | 1 medium napa cabbage batch, door shelf or main shelf |
| Large PP Press-Lid (e.g., E-Jen 5.5L / ONGOJIB 5.2L) | 5.2 – 5.5 L | 3.6 – 3.8 L | 26 x 26 x 18 cm | 2-cabbage family batch, bottom shelf |
| Extra Large PP (e.g., E-Jen 8.5L) | 8.5 L | 5.9 L | 30 x 30 x 20 cm | Bulk fermenting, kimchi refrigerator only |
| Wide Fermentation Crock (glass, 5L with airlock lid) | 5.0 L | 3.5 L | 22 cm diameter x 23 cm H | Long ferment, precise anaerobic control |
Measure your refrigerator shelf height before buying. Most standard US/EU fridges have 16-18 cm of clearance between shelves and only 32-35 cm of depth. Square PP kimchi containers use that space far better than tall round crocks.
Best Kimchi Storage Containers for Fermentation by Material and Design
1. Press-Lid PP Containers with Inner Vacuum Plate – Best for Active Fermentation
This is the classic Korean design popularized by E-Jen Premium and similar ONGOJIB containers. It has an outer locking lid plus a second inner press plate that sits directly on the kimchi surface.
Why it works for fermentation: The inner plate minimizes oxygen contact, which slows yeast growth and surface discoloration, while the outer lid’s silicone gasket and one-way valve lets CO2 escape without you needing to burp daily. PP is odor-resistant enough for fridge storage, lightweight, and will not crack from brine. Usually $15-$35 depending on size.
Trade-off: PP will stain red over 6-12 months and can retain garlic odor if you store very ripe kimchi. Soaking the gasket and inner plate in a baking soda solution helps, but glass remains superior for odor control.
2. Borosilicate and Tempered Glass with Locking Lids – Best for Odor Control and Small Batches
Containers like Glasslock, LocknLock Bisfree Glass, and IKEA 365+ are fermentation-safe because glass does not absorb acid, color, or smell and seals completely with a four-hinge lid and silicone ring.
Why it works: No odor transfer to the fridge, no staining, and you can see fermentation bubbles and brine level without opening. Glass is ideal for fridge aging after the initial 1-2 day counter ferment. Usually $12-$30 for 1L-2L sizes, $30-$50 for larger 3L+ sets.
Trade-off: Fully airtight glass has no automatic pressure release. You must leave 25-30% headspace and burp the lid once daily for the first week in the fridge, then every 2-3 days. Do not use decorative glass with weak clip lids or thin craft jars; they can leak brine when laid on their side.
3. Specialized Fermentation Jars with Airlocks – Best for Control, Not for Fridge Efficiency
Wide-mouth glass jars with a water airlock or silicone one-way valve lid (often sold as fermentation kits) provide the most stable anaerobic environment. They are excellent for 2-4 week controlled souring, especially for vegan or low-salt kimchi that is more prone to kahm yeast.
Why it works: The airlock vents CO2 continuously and blocks all oxygen, which produces a cleaner sourness. Usually $20-$45 for a 2L-5L kit including weights.
Trade-off: Round shape wastes fridge space, they are fragile, and you still need glass weights to keep cabbage submerged. Best used for the first ferment, then transfer to a flat PP or rectangular glass container for long-term storage.
Decision Matrix: Which Container Fits Your Situation
| Your Situation | Recommended Choice | Why |
|---|---|---|
| You ferment 3+ kg at once and own a kimchi fridge or deep bottom shelf | 5.5L – 8.5L press-lid PP container | Maximum usable capacity, valve prevents pressure buildup, stackable square design |
| You make small 1 kg batches in a standard apartment fridge | 1.1L – 2.0L rectangular glass with 4-hinge lock | Zero odor, fits on door shelf, easy daily burping, no staining |
| You hate kimchi fridge smell above all else | Glass only, avoid PP | Glass is non-porous; PP will eventually hold odor even with washing |
| You ferment at room temp for 3-5 days before refrigeration | Airlock glass jar, then transfer to PP/glass | Airlock prevents having to open and exposes less to oxygen during peak CO2 |
| You need leak-proof transport (lunch, sharing) | Glasslock/LocknLock style glass or PP with 4-point locking gasket | Gasket + hinges pass tip-test; single press lids without gasket will weep brine |
Leak Resistance and Odor Control Tips That Matter More Than Brand
A container’s seal design matters more than its material thickness. To prevent leaks:
- Always keep the silicone gasket seated and dry before closing. A wet or twisted gasket is the most common cause of brine leaks on fully sealed glass.
- With press-lid PP, press the inner plate down until brine just pools over the surface, then close the outer lid. This removes trapped air that pushes brine upward overnight.
- Never store kimchi on its side long-term, even in a leak-resistant container. Pressure and tilted brine will find any micro-gap.
- Replace silicone gaskets every 12-18 months if you ferment continuously. Stretched gaskets lose tension and cause slow odor leaks that you notice as a fridge smell before you see a puddle.
For odor control, store the container on the coldest, most stable shelf (usually the bottom back, at 0-3 C / 32-37 F), not the door. Cold slows fermentation and reduces volatile sulfur compounds. If you must use PP, store the sealed container inside an additional open baking soda box area or a secondary sealed plastic bag for the first week of peak fermentation.
Care and Longevity for Fermentation Containers
Do not use abrasive scrubbers on PP; micro-scratches trap pigment and smell. Wash with lukewarm water, mild unscented soap, and a soft sponge. For stained PP or lingering odor, soak overnight in 1 tablespoon baking soda per liter of water, then sun-dry for 3-4 hours. Avoid chlorine bleach on silicone gaskets; it degrades the seal faster than it removes odor.
Glass can be sterilized with boiling water, but PP should not be boiled. Most PP kimchi containers are dishwasher safe on the top rack, though hand washing preserves the gasket longer.
FAQ
Do I need a special kimchi container or will any airtight container work?
Any truly airtight, food-grade glass or PP container works for short-term storage, but a dedicated fermentation container with an inner press plate or valve makes active fermentation much easier and reduces oxygen exposure and manual burping.
Is plastic safe for acidic kimchi?
Food-grade polypropylene (PP, marked #5) is considered fermentation-safe and acid-resistant. Avoid polycarbonate (#7) and containers not labeled BPA-free, and never use reactive metals like aluminum or copper.
How often should I burp a sealed glass container?
Once daily for the first 7-10 days after making, then every 2-3 days once sourness stabilizes. If you see bubbling or the lid feels pressurized, burp immediately by cracking one corner, then reseal.


